Repairing My ChipTAN Generator
Many German banks adopted the ChipTAN scheme for online-banking over the last few years. Although many of them nowadays also offer TAN systems based on SMS or smartphone apps, I still trust the smart card based ChipTAN scheme most. Unfortunately my Kobil "TAN Optimus comfort V1.4" started to develop defective pixels as can be seen in the following figure.
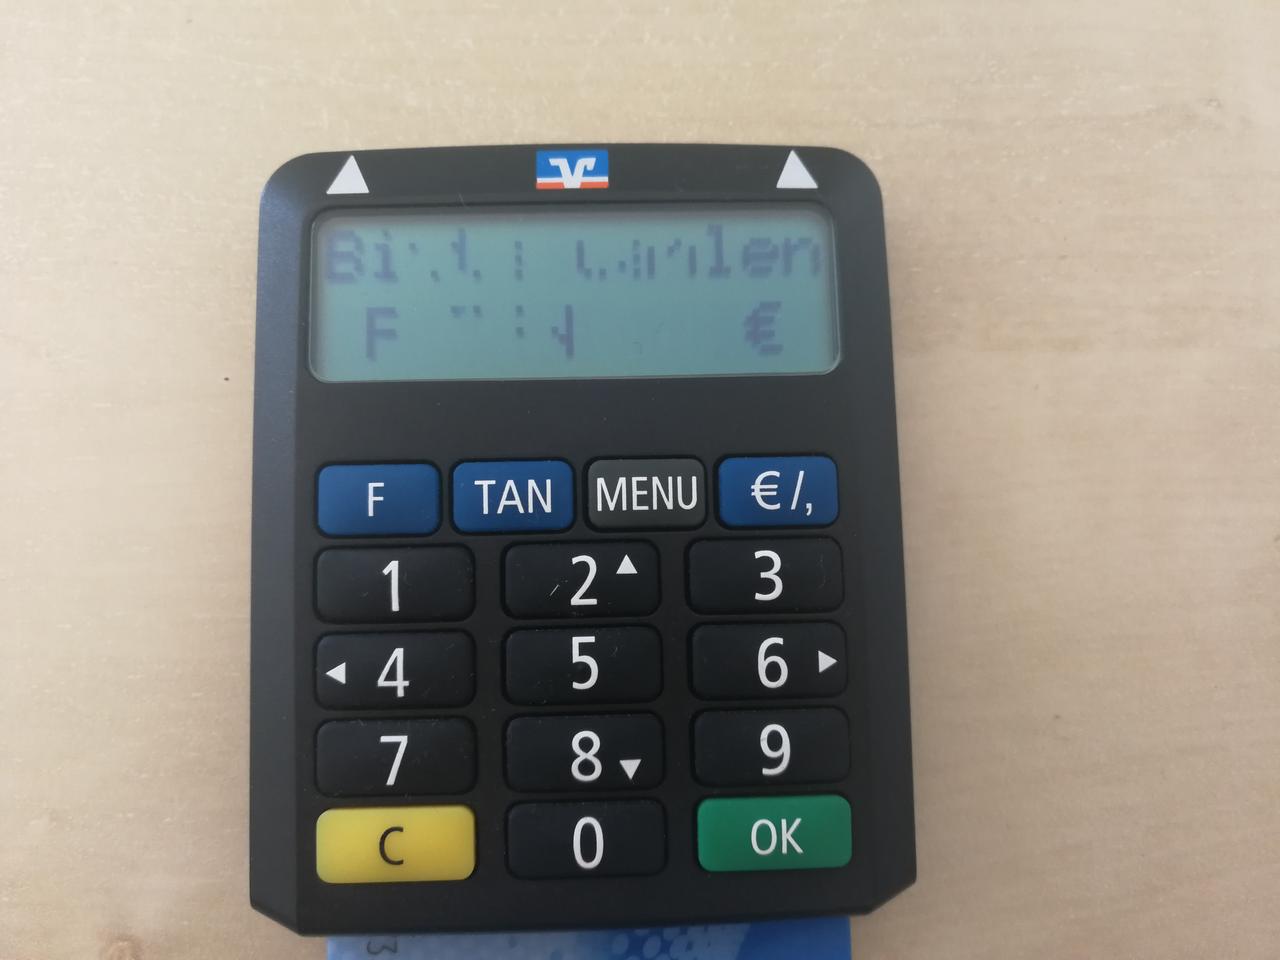
With only a few pixels missing it was still reasonable to use it, but lately it was not possible to correctly read the generated TANs anymore. Of course I tried changing the batteries when the symptoms began, but this did not help. A cross check with the multimeter also showed the batteries were still fine. As the dead pixels sometimes worked spuriously again for short moments I began to suspect that the display itself was probably alright and the fault is somewhere else.
Searching the Internet did not yield many results but with different search terms I finally found an older post from the iwenzo portal put. It contained useful hints to eventually fix the problem myself.
Connection Issues
The forum post describes the real problem to be the connection of the ribbon cable for the display to the PCB. As this seemed very plausible, I decided to give it a try. Disassembling the device is simple. Start by turning it around so it rests on the keypad. Now remove the four screws at the corners and the one in the battery compartment and you can lift the cover.
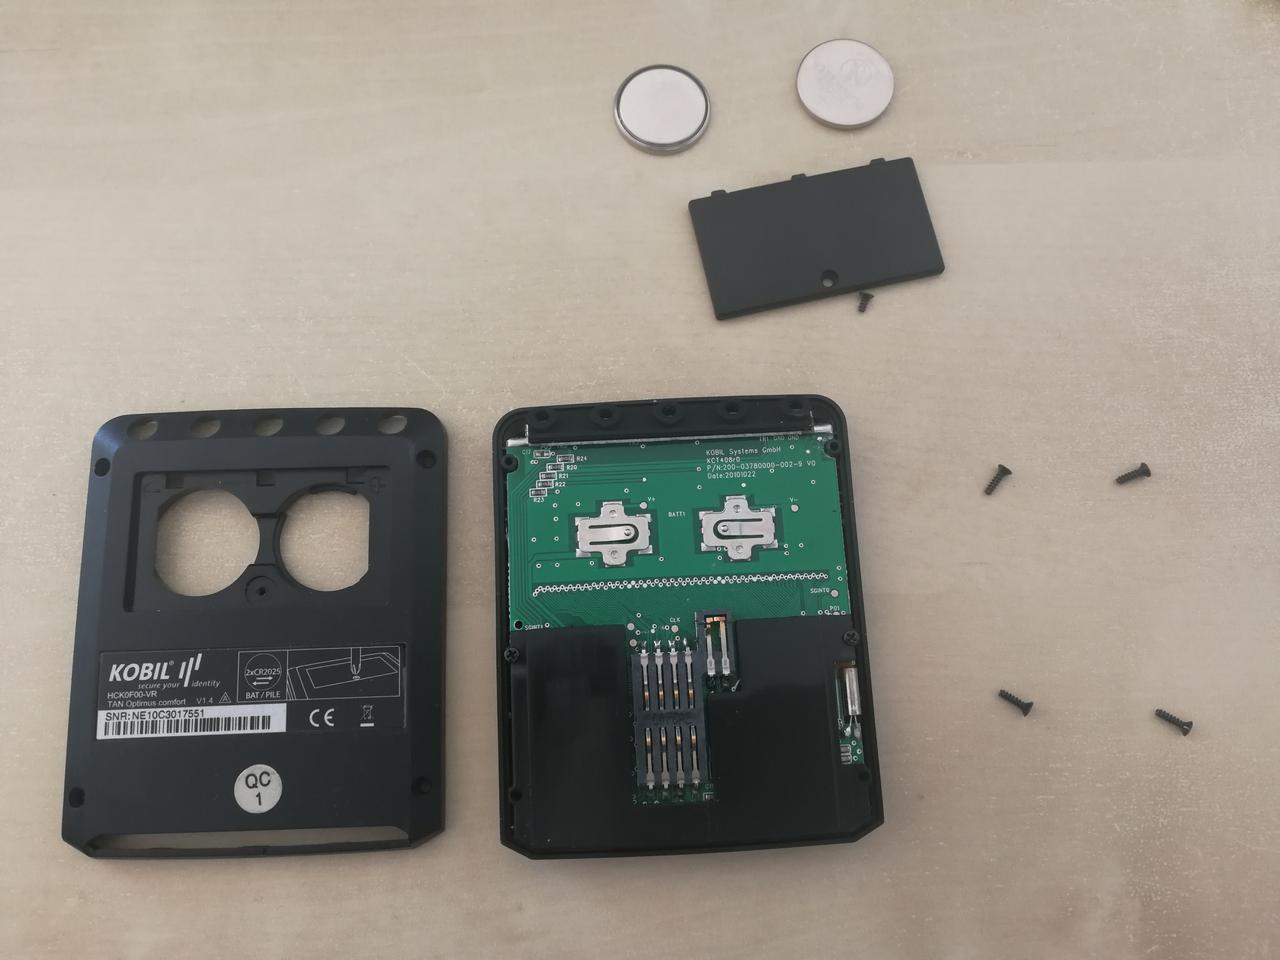
Next we have to remove the two newly visible screws holding the plastic compartment in place. As we want to get to the display, we need to get the PCB out.
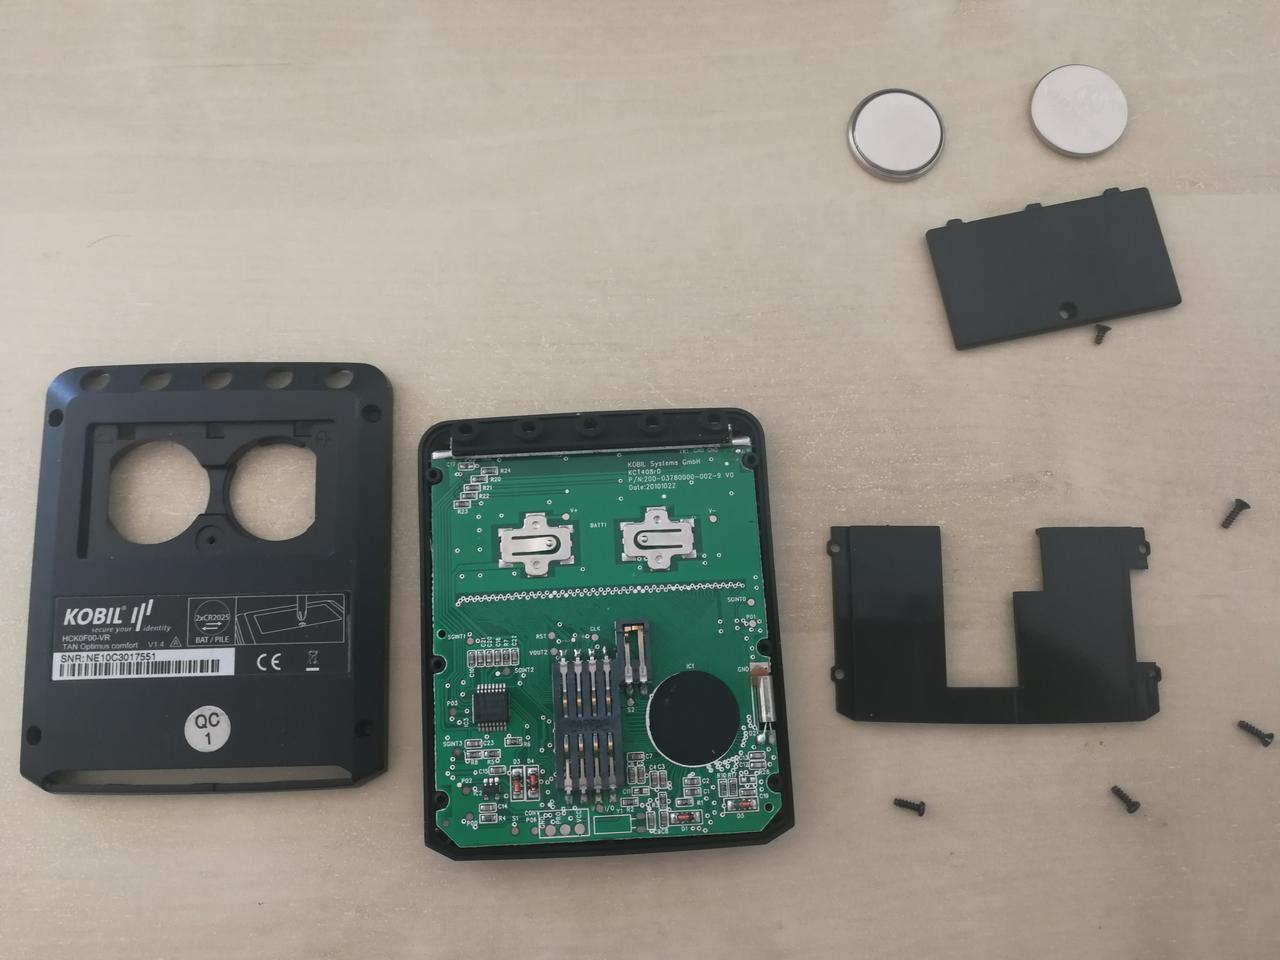
With the small plastic cover removed we can now remove the PCB from the assembly and turn it around to get a clear view of the display and the input switches. The ribbon cable connecting the display to the PCB is now in plain view and easily accessible.
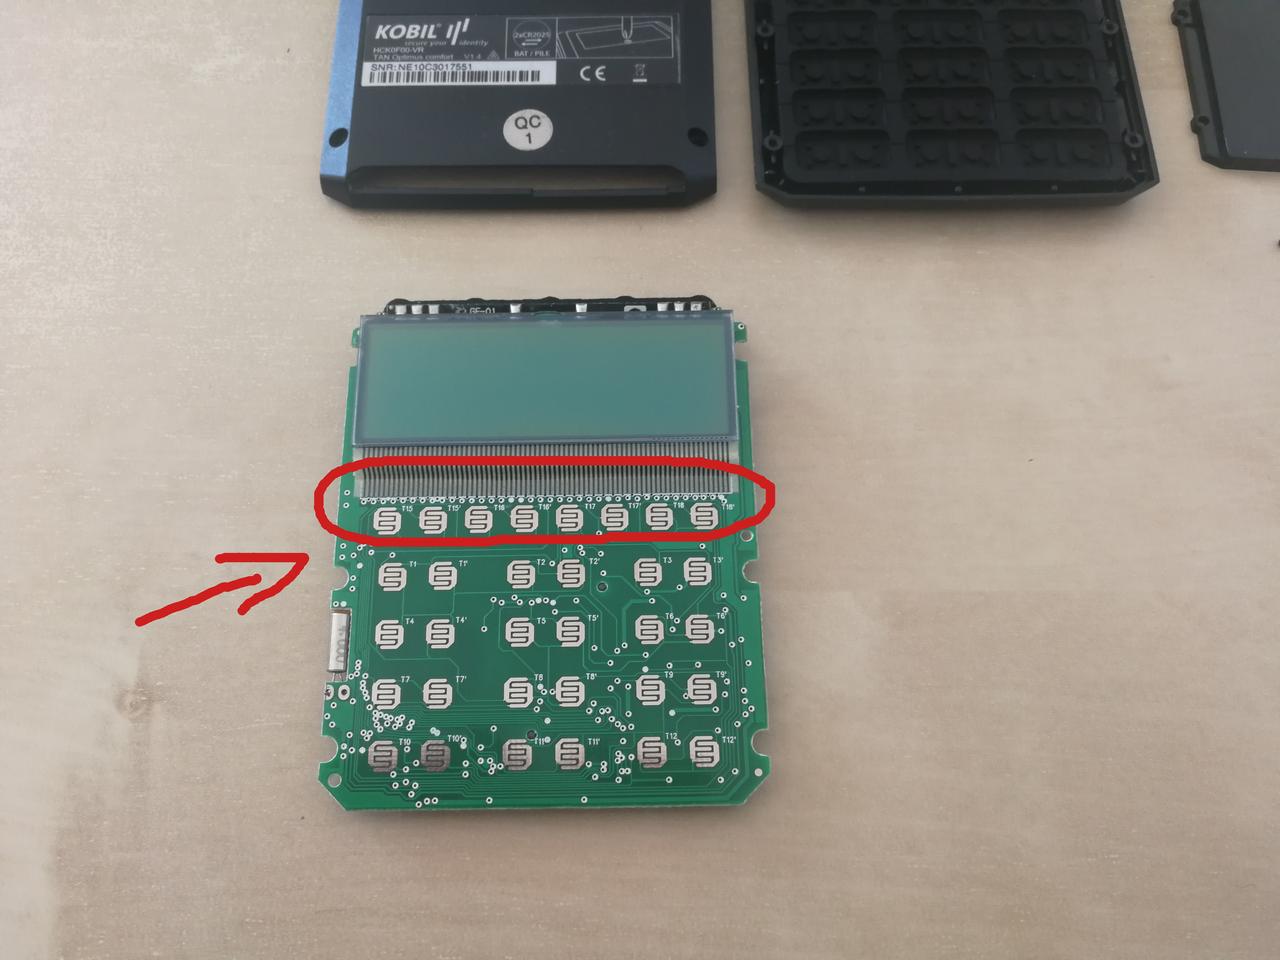
The actual repair will reestablish all the soldering connections of this cable. A hair dryer should be good enough but my toolbox contains a hot air gun so I used that shown in the next figure.
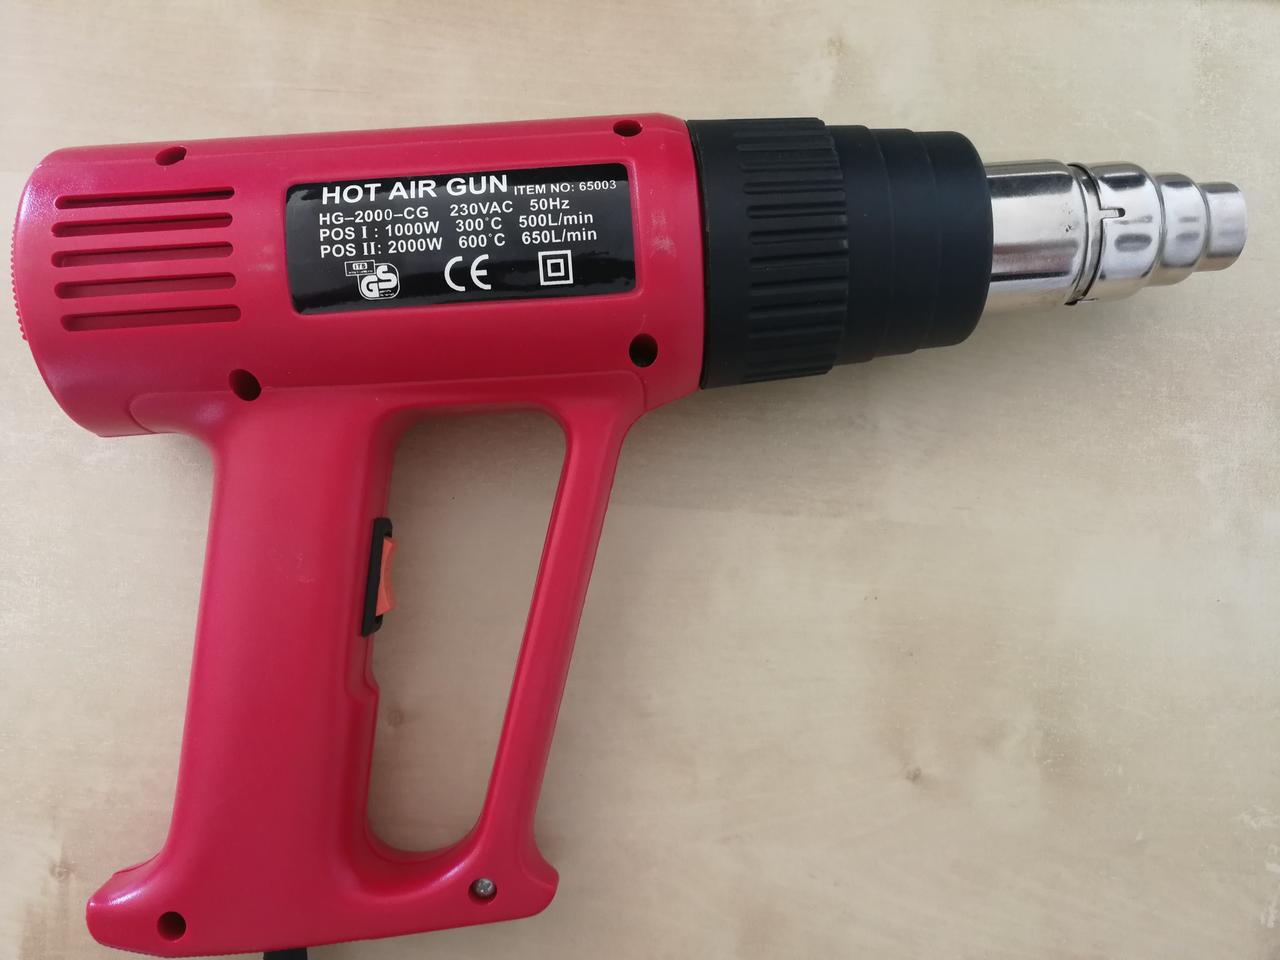
Now just carefully heat up the end of the ribbon cable and the area of the PCB it is attached to. Once heated up, I gently pressed the end of the cable to the PCB. The banking card still near by is actually a good tool to spread the pressure evenly over the complete breadth.
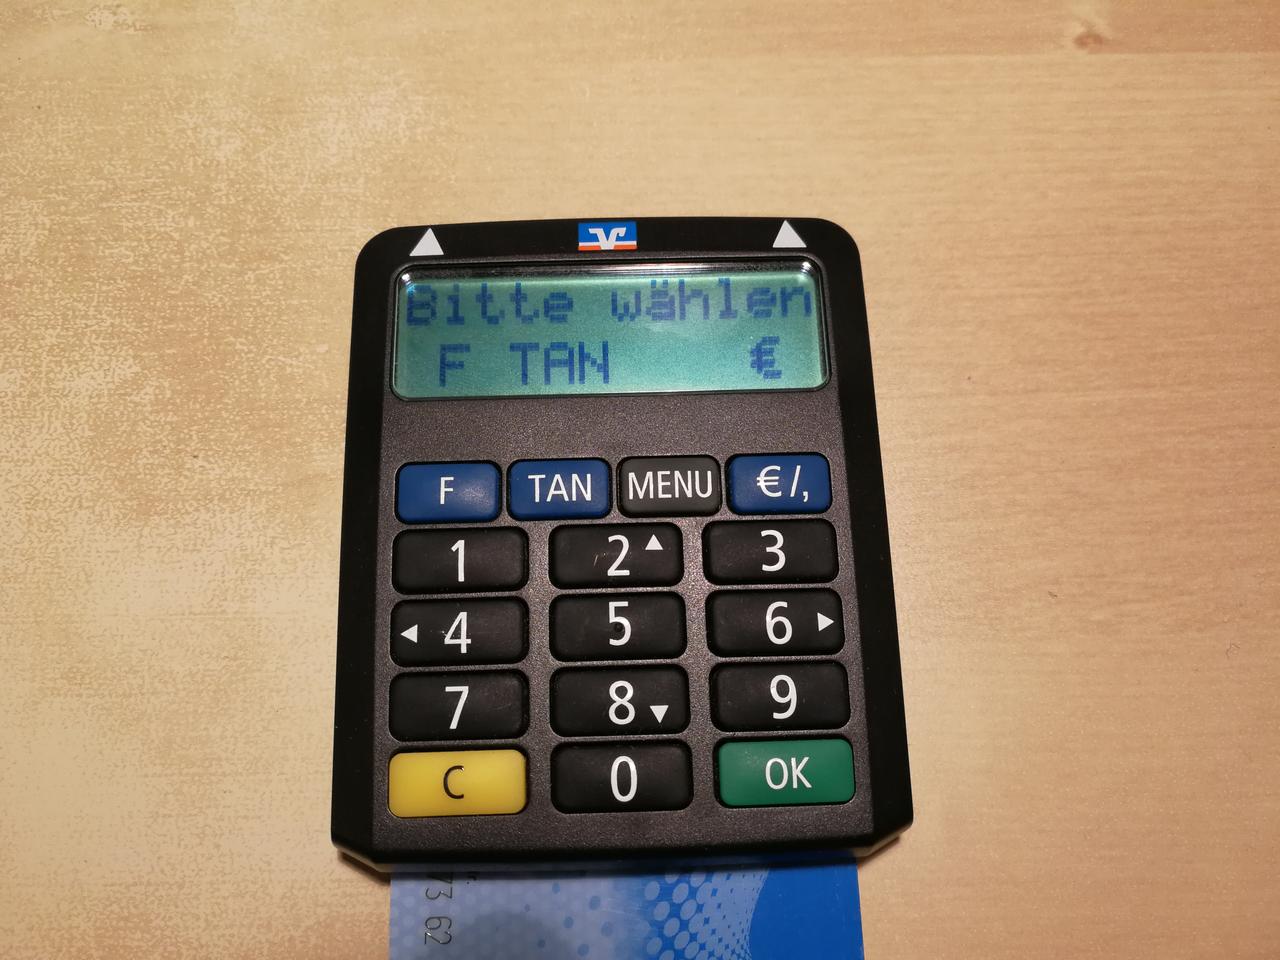
My first attempt obviously was not enough to fix the problems, so after reassembly and a functional test I disassembled the unit once more for another round of the heat treatment. This time things worked like a charm as can be seen in the next figure.
Summary
Sometimes repairing devices can be pretty easy once you trust yourself that you can do it. Even SMT connections can sometimes be fixed with simple means. Just remember: if you were to throw away the device without repair, you have literally nothing to loose while trying.
Update 2021-07-05
After repeating the procedure two more times, the device is now finally beyond the reach of my simple repair. Even though the display worked nicely immediatly after reassembling, it deteriorated after only a few minutes and repeating the process just ended with the same results. So I have to switch to a different TAN generation scheme and throw the device away.
Comments
Comments powered by Disqus